How I made a brick patio in just three terrible months!

We just had our annual Independence Day family party, and it was lovely, despite the almost continuous rain. It’s a cookout party, and our house isn’t really big enough to host a crowd indoors, so we assembled our chairs and folding tables under two canopies and a tarp, and my sister brought a giant tarp which my two brothers-in-law turned into a serviceable tent.

AND, we had a patio! A brick patio that I’ve been working on since the beginning of April, hoping to get it done in time for the party. I finished the day before.

Here is what the yard looked like when I first started out.

I used to have some raised garden beds there, but moved them across the yard, and dumped the old tomato plants out of their buckets, and placed them to give me a general idea of where the patio would be.  

I took lots of pictures at every step because I didn’t want to be unpleasantly surprised with how it looked when it was finally done. Every time I made a decision about the design, I took pictures from every angle and stood in different spots in the yard and stared menacingly at it. I really wanted it to fit in the space in was in, and to look complete from every perspective.

That’s the part I did right.

The part I did wrong was . . . every other part. Now I’ll tell you about that! (Guys, this is LONG. Only keep reading if you like DIY stories with lots of pictures.) 

Building a brick patio in your yard is pretty straightforward. You have to dig down several inches all across the area you want to pave, and line the perimeter with some kind of durable edging to keep everything in place. Make the exposed earth level, compact it, lay down a weed barrier, lay down a layer of gravel and then a layer of sand, and then you can put down your bricks, keeping them level. Then you add more sand on top, sweep it in firmly (or maybe compact it again with a machine), and there it is. There are many websites and videos online that give you step-by-step details, but that’s the basic idea.

So back in April, I started collecting bricks. Bricks at Home Depot are about 74 cents each, and they’re made of concrete, which just doesn’t have a lot of character. 

They’re just big, red, friable biscuits in brick shape. The reason people like to reclaim used bricks is because the old ones are made of clay, and they look like they have seen some stuff.

And they feel good. Sometimes they’re almost silky smooth, and they hold warmth or coolness beautifully. They turn an incredible variety of colors — not only red, but pink and purple, orange, tan, white, green, yellow, blue, and black. Some of them are like little islands where you can imagine whole secret histories have taken place. Nothing like real brick. 

So Benny and I drove out to Templeton and bought a load from a guy who was remodeling his house for his in-laws to move in. I paid about 50 cents apiece for them, plus a lot of broken ones, which I thought I would need for design reasons. Loaded them up

brought them home, and trucked them into the backyard with a dolly.

But what would the patio look like? Pinterest, of course, has lots of ideas about patio shapes and brick patterns. I knew I didn’t want just a plain rectangle, because boooo, boring; but the space I wanted to cover was too irregular for a half-circle. So I tried this and that, and came up with some complex and incoherent designs.

I remember my father tiling the bathroom floor and coming up with a design which was very cool, but didn’t quite land in such a small space. It didn’t have enough room for you to see how the pattern actually worked. So I really wanted to get the proportions right. 

Eventually it dawned on me that the St. Joseph garden I was thinking of as a focal point could be re-oriented, and that could become a side garden, and I could put St. Joseph under the peach tree, and the patio could radiate out from that. Then it all fell into place, and I settled on a basic shape and orientation.

At this point, I took a little side trip and started collecting flat rocks from the stream which we are lucky enough to have in our back yard.

I wasn’t really sure if they would be all or part of the design, or if I was gonna have funky rock flowers in there, or if the whole perimeter would be rock, or what. But we sure do have a lot of rocks.

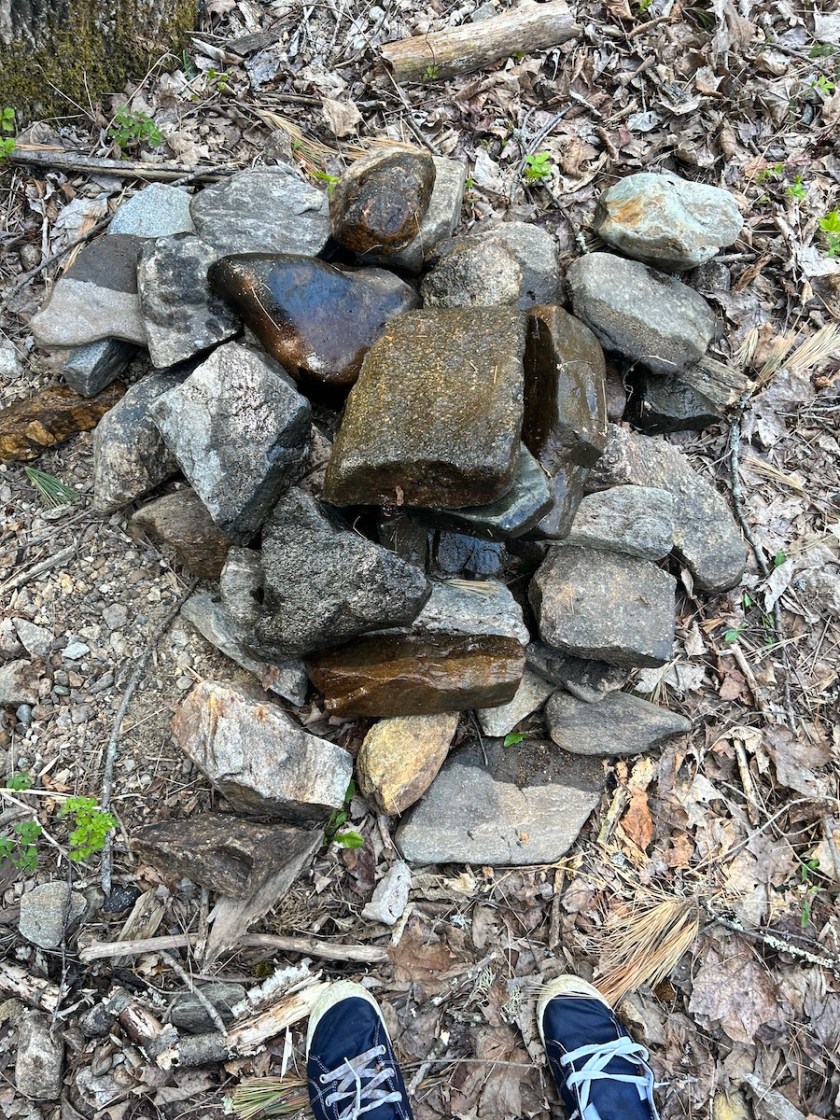
I collected a bunch and then paid a kid to bring them all into the yard for me, because I was starting to get pretty wheezy.

Then, surrounded by boxes of bricks, I finally started to dig. 

The ground slopes somewhat, and I thought I wouldn’t mind if the patio sloped a bit, too, as long as it did so at a constant rate. But you know, as I continued digging, and dumping the clods of earth into the broken wheelbarrow, and trucking them across the yard, and crumbling the soil away from the grassroots because I needed the dirt for my new garden and I freaking hate paying for dirt, I started to lose focus, somewhat, in this notion of how deeply I was supposed to dig, and where. I just kind of kept digging whenever I had time, and life kept chugging along, and it took a really long time and I changed my mind a few times about the shape of the thing, but I just kept digging. But was it level? Newp. 

I realized a little island of green would look nice around the peach tree, and would be very pretty inside a curve of brick, so I fenced off that area with dollar store fencing, and this helped me visualize the whole project. 

The next load of bricks I found was free. These were from a guy on Swiggey Brook Road who couldn’t stand NH winters anymore, and even though his backyard had one of the most breathtakingly gorgeous New England views I’ve ever seen, he said the only thing he would miss was the stately pink magnolia tree that sprawled all over his yard.

I had no idea how many bricks there would be, and there were SO MANY. These ones turned out to have holes in them, and are thicker than standard bricks. But SO MANY. I was by myself this time, and loaded and loaded and loaded bricks until either I or the Suburban was going to collapse like a bunch of broccoli

so I had to leave a hundred or so behind. Drove home, fishtailing like crazy, and Damien and I got those bricks unloaded into the driveway, praying I hadn’t wrecked the car’s suspension.

I can see by my camera roll that, at this stage, I was still taking screenshots from Pinterest and trying to figure out exactly what shape the patio would be. It finally clicked: A sort of . . . irregular half-octagon, with a long end and a curved chunk taken out of the middle side, and also another curve. You know, one of those! 

It had all the elements I wanted: Straight sides, so it would look orderly and wouldn’t be a nightmare to block out; but also not symmetrical, so it would work in the irregular space that it needed to fit in, and would have an organic feel; and with an interior design (rays coming out of a central spot) that was easy to grasp visually, and that would work no matter what size the patio actually turned out to be. (I am thinking of adding a path from the house to the patio in some future year, so I want to make sure it’s expandable.) I got some sticks and some string and mapped out the perimeter.

 I also wanted lights around the patio. I have always loved string lights, and had seen several pretty patios with wooden or metal uprights anchored in flower planters. Those half whiskey barrels are unreasonably expensive, and I didn’t want some cheap plastic thing that would fall apart, so I thought maybe I would knock together some simple wooden planters and build a wooden upright directly into the planter. (I always think I can just quickly knock something together, even though I truly cannot.) Or failing that, I could just buy some plastic buckets with lids, fill them with rocks, cut a hole in the lids, and jam some t-posts in there.

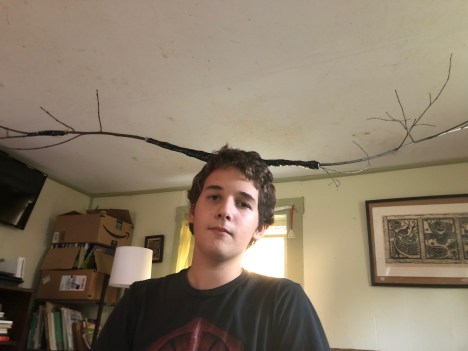
But then I realized a late spring storm had felled several young aspen trees

which would make very pretty uprights, and they were FREE. So I finished detaching them from their stumps and clipped off all but a few branches (Sonny helped with this part, to his immense delight), and set them aside to figure out later. 

And back to digging! I kept it up, a little here and a little there until finally I got the whole thing dug out. 

I used some of the sod to cover the spot where we had a bonfire a few years ago, and nothing has grown since; and it took root very well, and now that’s all green again.

I dug up a bunch of marbles, some kind of strange metal thing,

plus a toy car, an old chain with a fancy hook on the end, and a little white ceramic pig, which has since disappeared again. 

At this point, I had filled the buckets with soil and used duck bedding and planted them with seeds and some lily bulbs that were on clearance. Some of the seeds were marigold seeds I had saved from last year’s garden! First time I’ve ever managed to do that. 

I also decided that I definitely wanted a “ray” or “pie slice” kind of pattern radiating out from the statue, so I tied some strings to the peach tree and segmented the dirt up into wedges.

Then I started calling around for sand and gravel prices, and let me tell you, if you want a woman to buy your sand and gravel, the main thing to do is to not act like she is an idiot who is making you angry by calling you. I’m not kidding, the first guy who didn’t treat me like an absolute pustular moron was a winner. We discussed exactly what project I was doing, and what other people had ordered, and I ordered five tons of 3/8 inch crushed gravel and about the same amount of sand, both of which arrived right away.

Or, what arrived was . . . a bunch of dirt with rocks in it, which was apparently the gravel, and a bunch of dirty sand with smaller rocks in it, which was apparently the sand.

But it was already May 31, and there were now two large heaps in my driveway (and we have a LOT of cars needing spots), and I was still riding on the high of not being yelled at by a stranger on the phone, so I decided it was fine. It was cheap, I have to admit! 

So by this point, I had been dealing with some kind of mystery medical problem for several weeks, and had spent a considerable time at various doctor’s offices, or worrying about my next appointment, and the project had really stalled out, mostly because I was not sure if I was going to drop dead unexpectedly. My hope was to do this project more or less entirely on my own, but after the piles sat there for a while, I just went to the kids and totally played the Wheezing Mother Guilt Card, and got them to bring the gravel down to the back yard for me. 

Then it was really time to settle on material for a perimeter. I didn’t have enough stream stones to go around the edge, and the kids were already mad at me, so I decided pressurized wood was the way to go. We have a lot of scraps of it left over from various I-don’t-even-know-what, old swing sets and horseshoe pits and who knows what. So I pieced together enough to go all the way around the perimeter, everywhere where there wasn’t already rock.

I made an attempt to hold it in place with plastic anchoring stakes, with mixed success. 

So, this is where the integrity of the project really started to slip.

I can’t quite remember the sequence of events, but I think I rented a plate compactor from Home Depot (they didn’t have a Jumping Jack tool, and the other local rental place didn’t even pick up the phone) and compacted the soil, and then I had the kids spill the gravel (or “gravel”) onto the soil, and I made a long screed out of scrap wood 

This struck me as highly amusing, because the number of times I’ve seen “FISCHER PRODUCES ANOTHER LOATHSOME SCREED” is higher than you might think! So there I was, with another screed. Ho ho ho. 

Anyway, I spread the gravel out as evenly as I could, and then I compacted it again. It’s very hazy in my mind now. That machine was super fun to use, though. 

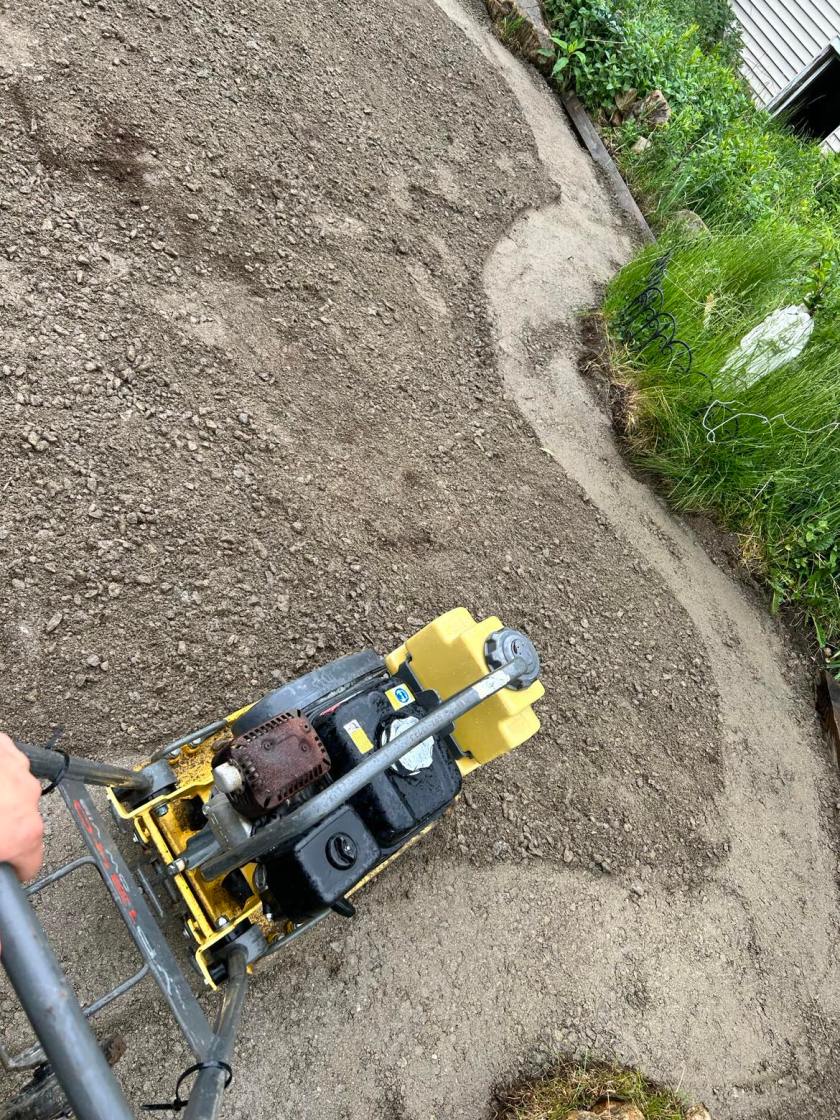
I’m not being sarcastic; it was very satisfying! 

BUT HEAVY. Good lord. Getting it back into the car to return it to Home Depot may be one of the least enjoyable things I have done this decade. 

Then I had all my nonsense in the emergency room and lost a bunch of time, and the dog ran over my lovely compacted soil repeatedly, and  sometimes it just be that way.

But eventually! Eventually I was able to get moving again, and this time I decided I would leave everyone alone and bring the sand down to the backyard myself. The wheelbarrow was now busted beyond repair, and I had to use plastic tubs and a dolly. This completely sucked and I totally understand why I made the kids do it last time. 

But you know I would rather die than admit something is too hard for me twice, so I got that effing sand. 

I came up with many idiotic and inefficient systems for getting the sand dumped evenly over the patio without rolling the dolly wheels over the compacted gravel and ruining the surface. All were in vain. All I can tell you is it sucked, and the ducks heard all about it. 

I kept thinking about how all the articles said you could make a patio in a weekend. I think you really could. If you have a normal person’s yard, and if you don’t have to do anything else at all, and if you can just buy exactly what you need, and if people will deliver your materials right to your work area, and nobody gets sick, and nobody’s mad at you, and people aren’t constantly graduating and having birthday parties and going to the hospital and climbing mountains and having concerts and planting gardens and raising ducklings and so on. But where’s the fun in that? Where’s the romance? Where’s the ha-cha-cha?

So I got the sand on the patio, and again employed my loathsome screed, and there we were. Ready to think about bricks again.

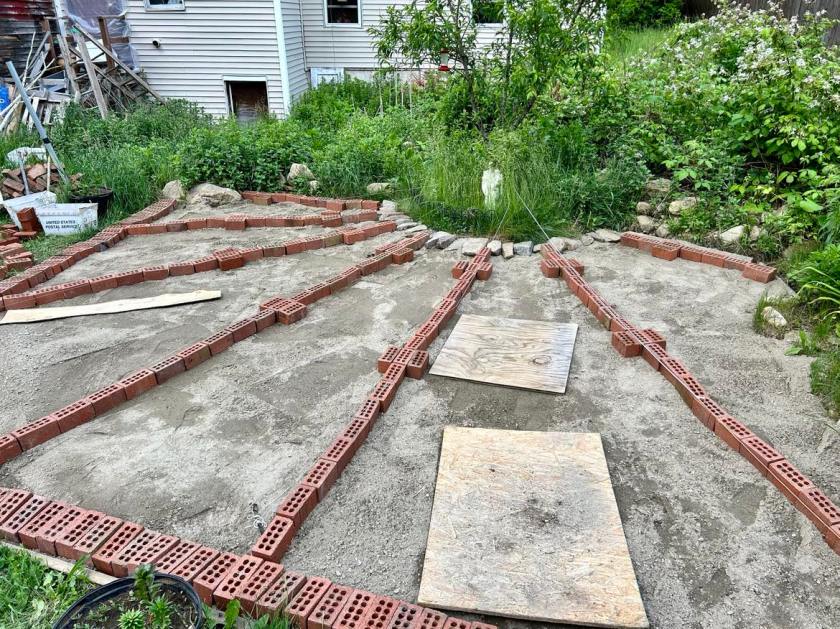
Actually, first I sorted my stones and made a little ring around the statue. 

Here you can see the segmenting strings in this photo. Guess how many times I tripped over them. Guess!

No, more than that! I hurt myself so many times in such comical ways these past few months. I stepped on a rake like an absolute cartoon character. I hit my same thumb with two different kinds of hammer. I accidentally dumped dirt on my own head numerous times. My toenails are purple and my fingertips look like a crime scene. I got sunburned and road rashed, bitten by ants and frightened by toads. BUT, I did not drop dead unexpectedly! Or even expectedly. 

And then it was time to make some design decisions. I was pretty sure I didn’t have enough bricks to do the whole thing yet, but I didn’t think I would be getting any more bricks with holes in them, so I figured I could get that part of it settled. I discovered I had enough hole bricks to make lines between the ray segments, and also all the way around the perimeter. 

Here is where I started to run into my first real design difficulty. I had measured it carefully and staked the strings out so they came out evenly spaced and the wedges were the same size. But when I put the bricks down, it didn’t look right. I don’t know why — probably because the yard is not all flat and right angles and so on — but when it was measured right, it looked wrong. So I moved the bricks around until it looked balanced from all angles, and just had to tell myself to forget that it was in the “wrong” spot. But we’ll return to this later. Oh, we will return. 

Then I started to fill in the bricks. My technique here, as I am just starting out, is what we in the field call “chimpy,” and I hadn’t really figured out how important it is to try to knock the bricks closely together.

I also found, to my intense dismay, that the hole bricks are CONSIDERABLY thicker than the standard bricks. So if I wanted to lay them together and end up with anything like a level surface, I was going to have to either dig a channel for the hole bricks, or else build up an extra layer of sand under the standard bricks. 

Patio how-to sites will tell you to stretch a string tautly along the top of your work area so you can line up the top of the bricks against it and ensure that they are all on a level; but light had already dawned on blockhead, and I realized that I would be lucky if I didn’t somehow hit myself in the face with a hammer or get a brick lodged in my ear or something. So I didn’t stretch any more strings, but just sort of grimly surrendered to the fate of scrabbling out trenches for the holey bricks to sit in.

It was worse than I thought it was going to be. It took SO long and it hurt me knees SO much and there was so much crouching and dragging and lurching and lugging, and I kept putting tools down just out of my own reach so I had to get up and get them over and over again, and it was really hot and I smelled bad. I cannot overstate how hard I made this on myself, for no reason at all.

Luckily, I enjoy this kind of thing. 

I really do. Despite all my complaining and the deep frustration that I fell into again and again, this was a joyful project. I have been waiting for 25 years for the time when I can devote hours and hours, week after week, to a project that’s all mine, just because I want to. I love being outside, I love working with my hands and using my muscles, and I love designing things. It had been a truly punishing winter, and the hours that I spent sitting in the fresh air with the song of the birds and the smell of the wild mint and the rush of the stream, putting a foundation together piece by piece by piece — this was a pure gift. Pure gift. It did not escape me that I spent many hours on my knees, and I prayed many strange prayers. Silent St. Joseph heard all about it. He is a good listener, and there is a reason I put him at the center.

And I just kept filling in bricks and filling in bricks, and I got pretty okay at it. You lay the bricks pretty closely, and then tap them closer together, and closer to the previous row, with a rubber mallet, and then tap them more snugly into the ground. I never did figure out if I should be doing it in the reverse order, so I alternated. Follow me for more useless nonsense.

So then I ran into some more design problems, and realized too late that I was going to have to figure out how to make up the difference between the curved rows of bricks and the straight rows of bricks. Most people would have figured this part out already, but again

My great talent is the ability to sit in the dirt and hit things with a hammer even though I’m really hot. I can do it all day! And that is what I did. 

But then I ran out of bricks, and I thought maybe I could fill in the gap with stones from the stream. I gave it a shot, and it looked okay, but I wasn’t sure.

I was sure that I needed more bricks, though. I bought the next batch from a nice young couple who were renovating their house in Brookline. It had a paved walkway that ran alongside the house. Alongside, but not quite parallel, and it was driving them crazy, so I got a good price on the bricks. These ones were not clay bricks, but they had been in the ground for a while, so they had a decent aged look.

The dude was also very helpful in helping me pack the bricks in a more sensible way, with straps and pallets and stuff, so the ride home was much less exciting this time. 

Unloaded those mofos right into the backyard this time, because last time I unloaded bricks into the driveway, they stayed there for a month. 

I also tried putting a discarded playground slide over the gravel and sliding the bricks over it to myself,

allegedly to save time and energy, and this of course did not work, and was stupid. The only way to get a job like this done is (a) do a tremendous amount of tedious lugging or (b) make someone else do a tremendous amount of tedious lugging. 

Now, several people have asked me, “Didn’t anyone help you with this patio?” And the answer is, of course. Any time I asked someone to help me, they did. Sometimes they were nice about it; sometimes they were jerks about it. Sometimes I paid them and they were still jerks about it. And sometimes I asked Benny and Corrie, and they helped for a little bit, but THEN THERE WAS A FROG

The other problem I was encountering was that the bricks with holes in them were not actually bricks; they were ant condos. About half the holes were completely stuffed with soil that was studded with ant eggs and, more to the point, with their furious ant caretakers. So I had to spend a certain amount of time jabbing the holes with a stick to get the ant dirt out and reminding myself repeatedly that the bricks were free and the patio was my idea and ant bites don’t hurt that much.

But look, progress!

The thing that was taking the most time was removing sand, and sometimes gravel (not to mention convincing myself that there was a meaningful difference between the two, since I had paid a different price for the two materials). In some spots, I had to dig up a LOT of the sand and some of the gravel I had applied so carefully, to make room for not only the big holed bricks, but for the standard sized ones.

Why? I have no idea. I had made some kind of digging or filling mistake, and there was much too much sand on about half the area, so after all that lugging and spreading and compacting and so on, I just had to dig it up and schlep it away again.

I kept my spirits up by thinking about how, when I was done, without proper underlayment, the bricks would very likely just sink into the muck and disappear forever the first time it rained hard, and maybe I would do the same. 

One thing I could think of to cheer myself up was to get more bricks. This batch was free, the remnants of someone’s dismantled chimney in Keene, and they were beautiful, very dark and hardened, clouded with smoke stains. I guess I didn’t take a picture, though.

We picked them up on the way home from PorcFest, the annual Libertarian festival, where we had gone to cover RFK Jr.’s speech, because you never know how life is going to turn out, do you. 

At this point, I had to come to terms with the fact that I had made a grievous mistake with the design somewhere along the line, and when you’re doing a pattern made of lots of little bits, a little mistake turns into a bigger and bigger mistake as you go along. So I fixed it by adding another element to the design; but of course it wouldn’t look right unless I added that same element to the opposite side, also, because the design isn’t symmetrical, but it’s not completely chaotic, either.

Anyway, I kept slapping bricks down and digging gravel and sand out and smoothing it with my board and whacking it with my mallet, and when there was a weird gap, I had plenty of broken bricks to fit in there and whack into place. 

This in itself made the whole project worthwhile. There’s a gap, but not big enough for a whole brick, so you tap-tap-tap one side and get them all a little snugger, and tap-tap-tap on the other and get them in a little closer, and nope, it’s still not big enough, so you find a brick that doesn’t fit but one side almost does, and you wedge in the side that will stay still, and then you SLAM the other side with the mallet, and look at that! That little fucker fits after all.

Hit it a couple more times. Hit it till it’s level. And now it’s not going anywhere. 

But guess what happened? I ran out of bricks.

I found one more lady, also in Keene, who had some bricks. She was cleaning out the damp, weedy space on the side of her garage and felt that I was doing her a favor by taking them away. These bricks were lovely, too — cool, soft, and mossy and many-colored. There were some large white pavers mixed in, and a few half-crumbled bricks with “PRAY” stamped on them, which. 

Some of them were curved!

And now I was really down to the wire. I had toyed with the idea of taking the stream rocks out and planting some creeping thyme or other walkable ground cover in that tricky wedge-shaped spot, but I was just about out of time, and also would have needed to add more pressurized wood or something to hold the bricks in place.

So I just decided to keep smashing bricks in and filling up gaps, trying to keep some kind of coherent pattern but not wigging out about it, and trying to take a lesson from the old bricks I had collected: Enough time goes by, and they look how they’re gonna look, now matter how they started out. Right? 

So then, I, ran out of bricks again, and the time had come to go crawling to Home Depot. Hoooooome Depot. Home Deeeeeeeepot. Dammit.

I lugged over one of those terrible platform carts and loaded it up with 150 bricks, ignored how rude the embryo Home Depot lads were being about my need for bricks, loaded them into the car, unloaded them, lugged them down to the yard, and then, wow, did I really start bricking again that same day? I think I did. Anybody want to arm wrestle? I will win. 

It was pouring rain, so I got a kid to set up the canopy for me and I just kept slapping bricks down and getting them in there. The new bricks looked pretty dumb next to the old weathered ones. If I had had all my materials at the beginning, like some kind of DIY video person, I would have shuffled them all together before putting anything on the ground, and it would have been a normal-looking patchwork effect. Instead, it’s a little bit skin-graft-ish.

But that wasn’t the worst of my problems! The worst was that I FREAKING RAN OUT OF BRICKS AGAIN. Actually, the even worse thing was that I knew this was going to happen. I knew 150 bricks wasn’t enough. But I just wanted to get the hell out of there, so I stopped at 150.

I just did not, did not want to go back to Home Depot, not so soon. So I changed the design again. I inveigled some of my more public-spirited kids into moving a gigantic rock across the yard. It took all three of us almost having a simultaneous three-way heart attack, but we got it onto the dolly, and then I dashed back and forth putting one sheet of particle board and then the other in front of the dolly wheels, so they would have a smoother path across the yard. EXACTLY LIKE GROMMT.

via GIPHY

 It landed in a reasonable spot, looking reasonably butt-friendly, and I decided it was the perfect place for a little permanent seating. 

And then I went around the yard finding all the biggest rocks I could lug by myself, and I fitted them in where I could, to take up as much brick-replacement space as I could without it looking too unnatural. Then I slammed in the rest of the bricks to fill up the spaces, and I walked around whacking it here and there and scowling at it, and realizing that there wasn’t even a single unused whole brick anywhere left on the entire property.

And then . . . . it was done. 

I mean kind of.

The brick part was done, but then you still have to get sand in and on and over it, which helps stabilize the whole thing, and bind it together, and keeps the bricks from grinding up against each other and damaging each other, or floating away, or any number of undesirable things.

You can get polymeric sand, which you brush on and then sprinkle with water, and it becomes a kind of glue, and really seals the bricks together. You can do this if you are a MILLIONAIRE. Polymeric sand is like 2 cents a GRAIN. If you are me, you will slink back to Home Depot and buy 12 bags of paver sand, and dump it over the bricks. I knew 12 bags wasn’t enough, but it was all I could stand to buy at the time. 

But first, you will take a little break and have fun doing some AESTHETICALLY PLEASING parts. Just to keep the old enthusiasm up.

First I gathered up all the potted plants I could find, and potted some more plants (I kept rescuing almost-dead, one-dollar petunias from Home Depot, for instance), and arranged them around the patio along with some more rocks, bird feeders, and so on, and also some dumb little picket fence sections I got on a whim. 

And then it was time to follow through with my plans for the lights! The young trees I had set aside were about 3″ in diameter, so I bought a length of PVC pipe that is 4″ in diameter and used a reciprocating saw to hack off four sections, cut flat on one end and diagonal on the other.

Then I put it point-down into the ground, laid a wooden board across the top, and whacked it with a mallet until it was sunk halfway into the ground. I reached into the pipe and gouged out as much of the earth as I could, and then fit the tree into it, and jammed some rocks inside to make it more secure.

And they looked ABSOLUTELY CRAZY. 

But in a way that I thought was fixable. I kept telling myself, This all just used to be grass, and you had a vision! You still have a vision! So I kept going, even though the whole thing looked like someone was having a nervous breakdown in brick form. 

Then, back to sand town. I ripped open the bags and Benny and Corrie helped me work it in between the cracks

We carefully avoided getting sand in the bricks with holes, partially to ration the sand, and partially because I thought it would help with drainage. I knew the whole thing was off kilter, and I didn’t want water to pool anywhere, so I figured it would just run out through the holes.

This part took a long time, because I couldn’t find the handle for the push broom. 

But a friend clued me in that sand is your friend, and if I didn’t fill the holes with sand, they’d fill themselves with water, and then freeze, and then go sproinging off in all directions, and in the spring, I wouldn’t have a patio at all, but only heartbreak. (That’s a paraphrase, but she was right.)

So . . . the next day, the day before the party, I sent Damien to Home Depot, and HE got more sand. And I put the sand in the hole bricks. And also in the cracks between the regular bricks, that I had already filled, but which were now empty cracks again because the sand had filtered down overnight. He also found a push broom handle for me, so I could sweep like a human being instead of a monkey version of Cinderella. 

At this point, you can get the plate compactor again and get it vibrating really good to shake that sand deep down into the cracks. But I had uhhh run out of money kind of a while ago, so I just kept sweeping. My plan is to buy more sand later in the summer and apply more as it gets shaken down. I was just focused on getting the patio functional for the party, which was the very next day. 

I clipped the tops off the trees so they weren’t insanely tall, and put the light strings on. (I had purposely left little crotched branches near the top so I could hook the lights on.)

Corrie filled the St. Joseph statue with sand so it wouldn’t keep tipping over.

I clipped and weeded the surrounding vegetation, and found more flowers 

and plant hangers

and put bird seed and nectar in the feeders

I bought eight little solar stake lights and put five around St. Joseph

and three at the base of the tree lights. I used the cheap sand to fortify the perimeter, and the little collar of rocks in the center.

And finally, I got Elijah to set up a purchase I splurged on months ago: A little propane fire pit.

I love a campfire, but I am 48 years old and sometimes I just don’t want to go tromping around collecting firewood. Sometimes I want to turn a dial and poof, there is fire. 

And here it is! Here’s the finished project:

I completely forgot to put weed cloth down. So, oops. 

Overall, the pattern is a bit of a mess. It’s also incredibly uneven and will just get more uneven as time goes on. And the mismatched bricks are very visible right now

but should start to blend better with time. 

I do think it’s pretty secure within its bounds, so whatever shifting the bricks do, I don’t think they’re going to straight up leave. Right now, when you walk across it, it just feels like walking on a floor: It doesn’t shift or wobble, and you don’t hear that horrible scraping loose tooth sound. So the sand I’ve got there now is doing its job.

And I’m very happy with the overall shape of it. It fits well into its environment, there are lots of spots for me to plant more perennials (and none of the seven buckets of flowers have even bloomed yet, but they will in a few weeks!), and it’s big enough for more than one group of people to sit around and chat on, which feels pretty luxurious. 

Everyone had a good seat for the fireworks at the party.

I love the tree lights! The pipe keeps them anchored and also may protect the wood from rotting; we will see. It has a pleasant, rustic look, and will be very easy to take down in the fall.

I may add some more rocks on the outside so the white PVC doesn’t show as much, but it doesn’t bother me a lot as is. I will probably add some more bird houses to the extra limbs, or maybe a quiet wind chime or something.

Overall?

Success. Yeah. I did it. I did it!

Thanks, St. Joseph. 

Things I learned while DIYing

Lately, I have discovered I have a knack for minor home renovations, and by “minor” I mean “the entire household gets turned upside down for 72 hours,” and by “knack” I mean “nobody stops me.”

It started when I painted the kitchen and put in a new floor and trim and backsplash and ceiling, and then we put in a new bathroom floor (although that was because we had to, due to Sudden Catastrophic Bathroom Collapse; not recommended), and also several new walls and new tiles; and then suddenly the living room ceiling felt intolerable as it was, and so did the dining room ceiling, and then I was like, YOU KNOW WHAT THIS DINING ROOM NEEDS? And because it was afraid of me, it quavered out, “Please give me yellow and white paint and a new black and white floor with stars on it, and install a breakfast nook!” and so I did.

As a chronic over-sharer, I generally document my progress on social media, and people kindly say things like. “You have so much energy!” and this is true. It’s not a virtue. I was just born that way, and I choose to channel it into home renovation instead of world domination, because I don’t know what I did with my passport. They also say ,”You are learning how to do so many things!” And this is also true. In a certain sense.

Here is what I have learned about home renovation projects:

If you’re attempting a project you’ve never done before, always start with the most visible part of the room. This way, by the time you’ve actually acquired some technical skill, you’ll have worked your way around to the part that’s behind the box of mismatched roller skates, and no one will ever see the fruits of your great proficiency; but the section that looks like it was done by a baboon with a meth problem will be front and center for you and your guests to behold every day of your life.

Relatedly: If it’s something you already know how to do, always start the project, when you have plenty of energy and enthusiasm, with the big, easy parts, and leave the fiddly, exhausting, trying bits for the end when you are seeing double, the back of your neck is on fire, and your confidence and self-esteem are at rock bottom.

The reasons for these two rules are unclear, but I follow them every single time, no matter what the project, so they must be vital.

Also important to remember: Many of today’s problems have solutions the seeds for which were planted in your brain many years ago. In today’s project, for instance, I accidentally glued the front door shut. I’m not especially eager to have guests anyway, but my husband was on his way home with hamburgers, so it was looking pretty tragic for a minute.

But then I remembered a little something I had learned many years ago in physics class, a little something about inclined planes, and thinking about it made me remember how stupid I used to feel in physics class, because I never knew what was going on, because I never did the homework; and feeling stupid makes me feel mad, and I got so mad that I kicked the door really hard, and it popped open! And then my husband came home with the hamburgers. So you see, physics really works.

It’s not just you: They really have started printing directions smaller and lighter. What helps me is to fetch my reading glasses, turn on my phone’s flashlight, sometimes take a photo with my phone, enlarge it, and THEN ignore it completely and do it however I feel like, and then become baffled and enraged when it turns out horrible, the glue doesn’t stick, the pieces don’t join, the screws strip, the bits fall out, the center does not hold, mere anarchy is loosed upon the world, and also some stray macaroni gets painted right into the windowsill. It’s not just you. It’s a conspiracy.

It’s very easy to lose track of time when you’re immersed in a long project, but you do want to pace yourself. If you’re not sure what time it is and you can’t see a clock, just look at the bit of work in front of you and imagine hitting it with a hammer. If the very notion makes your brain go red with hot, hot desire, the hour is probably Late, and you should probably take a little break. Stand up for a while, stretch your legs, and go lurk by the kitchen sink and eat fistfuls of stale cake and questionable deli meat. This will clear your head until you can admit to yourself that you already hit the thing with the hammer, probably more than once, and you know perfectly well that’s not what “wabi sabi” means.

You can probably cover the smash marks with caulk, though. But you still may want to stop for the day, because the doctor has asked you to try to avoid the redbrain thing if possible.

Finally, don’t forget your yoga. Many of the stretches and poses will come in handy to help you sustain your peace of mind throughout the project. For instance, suddenly climb down from your ladder and assume corpse pose. This not only relieves tension in your whole body, it terrifies the children, and they stop asking stupid questions and run away.

I hope these tips help you in any projects you may undertake. Remember, if you have any questions at all, do not hesitate to reach out and ask, and I’ll be happy to help if I can. My door is always open. Unless I’ve glued it shut again.


A version of this essay was originally published in The Catholic Weekly on February 20, 2022.

What’s for supper? Vol. 117: Cumin is king

Ready, set, food.

SATURDAY
Grilled ham and cheese, pickles, chips

This weekend, the kitchen ceiling fell in. We knew it was on its way out (here was one hint from earlier that day:)

but the schedule got pushed up abruptly in a shower of dirt, pencils, and mouse poop. We mulled it over, did a few tests for lead paint, and decided our lives were already ruined anyway, so I tacked up some plastic sheeting and spent the day pulling down the stained, droopy, acoustic tiles that remained.

Underneath, as we suspected? A very promising stamped tin ceiling

with, um, a few problematic areas.

and

for instance.

Also we found a very fetching mouse skeleton, which, in my frenzy of productivity, I threw away. I now regret this. I also wonder where his head went.

We bought out house from the bank with no information, and have had to do some sleuthing to patch together a history. The previous owners’ home improvement choices are a mixed bag. When the basement was on fire, they just walled that area up. Okay, fair enough. But after the kitchen fire(s), they apparently decided that re-insulating was too much of a hassle, that the ceiling could easily be four inches lower, and that cheap and crappy never goes out of style. And who can fault them?

Oh yeah, us. We fault them! We fault them!

Anyway, here is what the ceiling looks like now:

When we have the emotional wherewithal, we’ll take those beams down (they were just nailed to the tin as a base for the acoustic tiles), remove as much paint as possible, shove a bunch of insulation (and a soupcon of mouse poison) into the holes and patch them up, and paint. Onward and upward.

Here’s an account of some of our previous half-assed kitchen renovations.

SUNDAY
Enchilada bake

Several friends tipped me off about making enchiladas so much easier by simply layering the components in a pan, as for lasagna, rather than rolling individual enchiladas.

The result: Yes, far far easier. Not much to look at, though.

The taste is, of course, just the same. I used too much sauce, so they turned out flabbier than even I would like (and I like flabby foods a lot). Verdict: will make again, because they were tasty and satisfying; but will also roll individual enchiladas again, if I have the time, because they’re nicer.

To make them, I coated some chicken breasts with oil, chili powder, salt, pepper, cumin, and garlic powder, and broiled them, then shredded the meat. In some casserole dishes, I made layers of tortillas, chicken, canned enchilada sauce (I did one pan with red and one with green), shredded cheddar cheese, and sauteed, diced onions — probably 3-4 layers of each ingredient– and then baked it in a 350 oven for maybe forty minutes.

We also had sour cream, but I personally declined. I was prepared to scarf down eleventy million calories in chicken and cheese, but forbore to indulge in a dollop of sour cream on top. Please! I am not from Havana!

MONDAY
Moroccan (?) chicken with chickpeas, pomegranates

Pretty fancy meal for a Monday! I was having such a productive day on Sunday, I went ahead and started the chicken marinating then. The rest comes together very quickly. It’s a simplified version of this recipe from the NYT Cooking.


And this is the recipe that taught me I’ve been spelling and saying “turmeric” wrong my entire life. I solved that little problem this time by being clean out of turmeric. I never did have fennel. I decided that as of now, cumin is king.

Let me tell you, there was nothing lacking in flavor for this meal.

It was just screamingly delicious. My husband who hates chickpeas loves this meal.

To make the marinade, I took half a large tub of Greek yogurt and mixed it with four tablespoons of lemon juice, four tablespoons of water, and two tablespoons of cumin. This I used to marinate probably eight pounds of chicken thighs and wings. I normally don’t like wings — they don’t seem worth the trouble — but for this dish, they were perfect. I let it marinate for 36 hours, but a few hours would work, too.

About an hour before dinner, I drained and rinsed four 15-oz cans of chickpeas and mixed them up with a few glugs of olive oil, a few more spoonfuls of cumin, salt and pepper, and two red onions sliced thin.

I spread the seasoned chickpeas in a single layer on two large sheet pans, then made room among the chickpeas for the marinated chicken. Then it all went in a 425 oven for almost an hour. The chickpeas and the onions may start to blacken a bit, and this is a-ok. You want the chickpeas to be crunchy, and the skin of the chicken to be a deep golden brown, and crisp. The top pan was done first, and then I moved the other one up to finish browning as we started to eat.

While the chicken is cooking, you prepare your three garnishes:
Chop up some cilantro.
Slice another two onions nice and thin, and mix them in a dish with a few glugs of lemon juice and salt and pepper.
Then take the rest of the Greek yogurt and mix it up in another bowl with lemon juice, a generous amount of minced garlic, salt, and pepper.
I just set these three dishes out and let people use them as they liked.

The sweet, tart pomegranate seeds are just delightful with the crunchy, savory chicken skin and the creamy yogurt sauce. Everyone got a quarter of a pomegranate and just dug in.

This is one of those meals where we kept shouting “SO GOOD! SO GOOD!” like a, like I don’t know what. But it was so good! This is a fairly cheap dish, too. Especially if you skip the turmeric.

TUESDAY
Spaghetti with jarred sauce and sausages, salad

I had about a dozen long Italian sausages, which I started to cook and then forgot about. Miraculously, they did not burn; but by the time it was dinner, I was so enervated that I just couldn’t bring myself to cut them into normal pieces. So everyone just got a bowl of pasta with a giant sausage lounging on top. No complaints.

WEDNESDAY
Taco Tuesday

Oops.

THURSDAY
Pizza

Nothing to say about that, except that I tried out one of those pizza pans with holes in the bottom (affiliate link through Skimlinks), and it did make the bottom more crisp. Usually we slide the pizza out of its pan for the last several minutes of baking, but this method is far less of an invitation to cheesy disaster.

FRIDAY
Tuna boats, roast cauliflower, french fries

Ooh, I think I have some sweet pepper and hummus, too.

Make the chicken! You won’t be sorry! Cumin is king!!!!

The Headless Bishop (and other Halloween costumes that work for All Saints Day)

We have a pretty good record of getting cast out of every Catholic community we stumble into. This is good news, because it means we never have to make costumes for All Saints Day (we do have fun making Halloween costumes, though).

But how about you? Did you suddenly realize that, in a fit of good Catholic momming, you promised to whip up costumes for both days? I’m here to save your bacon. These costumes are suitably edifying for any church-sponsored party, but edgy enough to earn you all the Mary Janes and Raisinets you can eat on October 31.

Your most obvious twofer choice is martyrs. Grab whatever weapon catches your fancy in the Halloween aisle, and you’re guaranteed to find some Catholic somewhere who was killed with it. We’re just that popular! Buy two tubes of blood, one for the gorefest and one for pious reenactments, and you’re set.

Hilarious on October 31
:

inspirational just a day later:

image

Everybody loves a good sight gag:

(instructional video here)

especially when it’s Biblically sound:

And finally, you can terrify the normals with this fantastic cephalophoric illusion:

(instructional video here)

Or, well, terrify the normals with something from the more obscure annals of martyologies.

(Not recommended: St. Agatha)

But there are non-bloody saints, too, and even some adorable sidekicks. You wear a ratty bathrobe and skip showering for a week or two, and you can pass as either a civic-minded individual tirelessly lobbying for societal and legal acceptance of an all-natural homeopathic remedies

(credit Todd Huffman via Flickr; Creative Commons)

or St. Francis, whatever

And who’s this tagging along behind you?


Awww, it’s da widdle wolf of Gubbio! Or a werewolf, take your pick.

Who doesn’t appreciate the time, effort, expense, and attention to detail that goes into a great mummy costume?

(Credit: Allen Lew via Flickr; Creative Commons)

Replace that sinister moan and lumbering gait with a fervent gleam in the eye and a pleasant, un-decompopsed scent, and you become, ovulously, Lazarus:

Here’s an idea which clearly marks you as one of those people who may be a little bit too enthusiastic about Halloween for someone your age:

(instructional video here)

But wait! With a few tweaks done in a sensitive and reverent way, you could easily be St. Christopher.

But don’t tell anyone it was my idea.

In closing, here is a joke I will keep telling until someone else thinks it’s funny. You can buy a Dobby mask, and BOOM, Curé of Ars.

What’s that you say? What are my kids going to be this year, if I’m so smart? I’ll give you a hint: So far I’ve sewed two furry leg warmers together, hemmed a black cloak, spray painted a few acorns gold, and bought some tulle that was on sale, and also kind of a lot of fake teeth. That’s right: We’re going, en masse, as the domestic church, and I just dare you to get in our way.

Homemade Halloween costume hacks for parents in a hurry

Halloween is almost here. How are the costumes coming?

I’m sorry. I didn’t mean to bring it up. Please stop crying. Did you want me to call someone? You sure?

All right, I’ve been making costumes for kids for over twenty years. I don’t really know how to sew, and I don’t want to spend a ton of money, and my kids often pick costumes that no one sells. So DIY it is.

Here are a few ways to make them . . . not easy, exactly, but much less hard. The most useful things I’ve learned:

MAIN BODY:

Giant adult t-shirts can be turned into all kinds of things, and they are already hemmed. Always always always use existing hems whenever you can! Tuck the sleeves in (sew or glue them if you like), and a little kid can wear a T-shirt as a skirt, using the neck as a waist. This is how I found a brown skirt for Avatar Kyoshi: brown t-shirt, $1, done.

You can also turn a T-shirt into a cape, using the already-existing neckline. Just cut off the back and sleeves of the shirt and “hem” the rest with hot glue or duct tape. This is not razzle dazzle, but will please a young kid.

Here are Zita the Spacegirl and Robot Zita, made with Daddy’s undershirts and some black plastic garbage bags:

Black duct tape would have been miles better, but this was an emergency “Mama, I forgot to tell you we’re supposed to dress up tomorrow for Whatever Day” costume.

Even cheaper: If you can’t find a plain shirt in the right color, get a shirt with a logo and turn it inside out and just cut off the tag if it shows. Here’s Wish Bear wearing an inside-out sweatshirt that had a different pattern on the other side, because we couldn’t find a plain light aqua sweatshirt.

I glued on a felt belly and decorated it with puffy paint. I can’t explain what was going on with those ears, though. This is a classic example of overthinking and over-engineering. I should have just cut two little ear shapes out of felt and clipped them to her head using tiny hair clips, or attached pipe cleaners to a headband and covered them with card stock or fabric. Easy peasy. As it is, she resembles Head Trauma Bear (which, come to think of it, would explain a lot about Care Bears in general.

Sometimes a good old paper bag gives you the look you want. Not recommended for masks if you’re planning to be walking long distances in the dark. This Strong Strong costume was for “favorite character” day:

Paper bags can also be converted into vests pretty easily — just cut a front opening and a neck and arm holes, and decorate however you like. You can bash in the corners to make it look more like clothing. You can also just cut a head hole and cut the sides off completely and make a boxy poncho, making the base for all kinds of square costumes (robot, Lego piece, iPhone, etc.).

Bathrobes bathrobes bathrobes. These are always abundant at the thrift stores around here. Manga costumes were a big deal one year, and I discovered you can take some quick hand stitches to make them fit the kid, then add trim (I glued on fur for one, and used metallic duct tape for another), then complete the look with a sash and sweatpants.

If you need a basic flowy dress or robe, turn the bathrobe backwards and do whatever you want to the neckline — trim it and hem it with duct tape, disguise it with a scarf, or hide it with a collar made of cardboard and tin foil. Using an already-existing article of clothing is always light years ahead of starting from scratch, and you can often find robes in fancy, silky fabrics.

Backwards button-down adult shirts also make good tunics or basic dresses. You can add high or low belts to vary the look quite a bit.  Check out this nice little prince in my shirt and my husband’s belt:

You can also use duct tape to cinch sleeves in wherever you like, which changes the look quite a bit.

If you need puffy upper sleeves and tight lower sleeves, cut the end out of long socks and put them on the kid’s lower arms. Over that, put on an adult long-sleeved shirt, scooch the sleeve up to the elbow and cinch them in place with duct tape.

If they’re the same color, it will look like it’s one top with fancy sleeves. Remember: nobody needs to know what it looks like underneath!

A giant cloak hides a multitude of errors. One of the few sewing projects I can manage is this basic hooded cloak. I’ve made six or seven of these over the years, but I find that you need to make the hood about 50% larger than what the pattern calls for. It’s a pretty forgiving pattern overall. Here is my daughter wearing a store-bought dress and the hooded cloak she made herself, with almost no sewing experience:

One year, a kid wanted to be Ash from Army of Darkness, and we just used a big wool blanket draped strategically and held in place with a giant safety pin. We made a tinfoil dummy clasp to cover the pin.

Guess what? You can spray paint some clothing. Search for items that are the right shape and style at the thrift store, and paint them the right color. It’s easier then dyeing, and paint will stick to, for instance, shoes and vinyl. It will crack eventually, but it’s good for a night.

I’m a fan of bath towel ponchos for costumes of things (rather than people). They are warm, easy to get around in, and the kid can wear something neutral underneath. Find a bath towel in the right color, cut a horizontal slit halfway up for the head, “hem” it with duct tape, and decorate it however you want.  Keep it rectangular and it can be a slightly floppy Creeper:

You can paint towels, I should say, but it takes forever because they are, duh, absorbent. I still think this is a good costume, but it was pretty time-consuming, if not difficult. It may have been easier to hot glue felt squares to the towel, rather than painting.

Fleece is also handy for these over-the-head, free-form costumes. You can cut it into all kinds of shapes and you don’t need to hem it at all. You can be, for instance, a piece of pizza (but you may need to reinforce the shape with strips of corrugated cardboard). Fleece is a little pricey, so I don’t often buy it from the fabric store.

If you can do a tiny bit of sewing, here are some tips from Elisa Low, who does stuff like this every day for the costumes she makes. Elisa says:

With a seam ripper and some minor sewing skills it is easy to remove the top part of a collar on a men’s shirt (the part that folds over) so you are left with only the round part that stands up, like they had in the Old West.

Boy’s colonial knickers are easy to make from men’s or women’s pants. Just cut off the bottom part, cuff them, and attach a decorative button on the outer side of each cuff.

As far as fabric, remember that clothes are made of fabric! So instead of going to the fabric store, go to the thrift store and look at the XXL clothes. Large dresses, skirts, coats… these have lots of fabric for low prices and you can make things out of them. Also look in the curtains and bedding sections for good fabrics.

For pics of some of Elisa’s projects, check out her blog.

HEADPIECES, HELMETS, CROWNS, and ACCESSORIES:

Horns, ears, antlers, etc. need to be as light and well-anchored as possible. Whenever possible, start with a store-bought novelty headband and build off of that, rather than trying to attach something to a plain headband. I bought some cheap bunny ears, bent them down, cut a hole in the top, ran the sticks inside, and taped over the whole thing with duct tape, and once we find some black spray paint and put it together with a black face mask and hood, we’ll have some light, sturdy tree branch horns for the Beast from Over the Garden Wall.

You can also take a headband, build on whatever shape you need out of pipe cleaners, and cover it with fabric or card stock or felt, or simply find some stiff fabric, fold it in half, cut out a double ear shape with the bottom still attached, wrap it around the headband, and glue it together, as we did for Squirrel Girl here:

Pillowcases are awfully handy if you are making a medieval headpiece, a veil for a nun, a pharaoh costume, etc. They can also be folded lengthwise and used as sashes, if the kid is skinny enough; and they are fine as basic capes with a few safety pins.

Plastic milk jugs make great Greek or Roman or Medieval helmets for people with small heads. Find a picture of the helmet style you want, trace out the lines with a magic marker, and just snip away, using the jug handle side as the nosepiece. You can spray paint them any color you like. Here’s a Spartan helmet on Pinterest; here’s a knight’s helmet with visor. You could even make a Mickey Mouse headpiece this way by adding ears and spray painting the whole thing black.

Milk jugs turned the other way around (with the flat part in front, not the handle part) are also handy for the base of whole-head helmets (like for a Storm Trooper or a gas mask), as long as they’re for small heads. Pretty much anything that needs to fit over a small head can start with a milk jug.

If the kid’s face will be covered, let him wear the helmet plenty beforehand, so you can be sure it’s breathable enough and he can see well. Also, if you’re using glue or spray paint, let it air out for several days before the kid wears it! You don’t need him passing out from fumes.

You can also use milk jugs for bishops’ mitres. (The mitre is the hat. You’re thinking of “crosier” — that’s the staff thing he holds.) Just find a clear picture and trim away. Add paint, ribbon, etc. to make it look authentic.

Milk jugs can also, sigh, be used to make an elaborate papier mache chain saw hand. Here are directions, if you insist.

If the paint does not adhere they way you like, or if you want more texture, rough it up with sandpaper before painting.

A round bottle, like for a large bottle of juice, can be cut into a crown or circlet, if the kid’s head is small enough Spray paint it gold and add some gems or whatever you like.

Those blank white masks from Walmart can be adapted in any number of ways. To make this Ichigo Kurusaki Hollow Mask,

I added paper plates to the top to make the skull round, and covered the existing eyes, nose, and mouth holes with paper plates and tape, and then re-cut the eyes in a different shape. Then I spray painted everything white and added the details with red and black Sharpies. Adapting something that’s already designed to be worn is almost always easier than starting from scratch.

Here’s a last-minute costume that began with a plain white mask, plus various items raided from past Halloweens:

I dunno what it is, but it got attention.

For some excellent, customizable masks, you can pay a small sum to download templates for 3D masks from Wintercroft. Friends tell me they are time-consuming to put together, but they turn out just as described. Really neat designs.

Disposable pizza pans from the dollar store make good shields that don’t get too heavy, and they’re already metallic, yay. You can also decorate them with hot glue and then spray paint it, for a worked metal look. Use duct tape to make straps behind. You can also color directly on foil with Sharpies.

Use the bottoms of small juice or soda bottles for excellent medallions or for crowns, dress trim, etc. Just cut the bumpy bottom off, maybe smooth the edges with sandpaper, and spray paint it gold. Lots of things look amazing when you spray paint them gold or silver. Here’s a handsome little vampire with a soda bottle Count Dracula medallion (I made a slit for the ribbon before painting, and glued on a plastic gem after):

Foam meat trays work well for stiff but light accessories. You want the kid to look good, but also to be able to get around; so keep weight in mind. Foam meat trays (washed thoroughly, of course) are great because you can cut them into all kinds of detailed shapes, spray paint them, glue things to them, and so on, but they won’t drag the kid down. BUT, some adhesives will dissolve foam! So test it first.

Pipe cleaners make decent last-minute glasses, if not especially comfy ones:

General rule for accessories: Keep it light. I’ve made this mistake more times than I can count: I forget how heavy everything is going to be, and the kid is overwhelmed. In this Rainbow Dash costume, I made everything way too big, and it was unwearable:

The following tools are your greatest friends to put on details that can really make the costume:

Colored duct tape, either to make easy hems or to add details, or both.

Puffy paint.

Felt. 

Foam craft sheets. These come with our without an adhesive side.

Sharpies. Sharpies can color on any number of surfaces, including foil and plastic. Elisa Low reminds us that you can color plastic gems, too. Brand name markers are much more brilliant and adhere better than cheapo ones from the dollar store. (Beware the treacherous “Sharple,” for instance.)

And of course hot glue.

Speaking of glue: I always root for glue before sewing, but I’ve ruined more than one accessory by using the wrong kind of glue. Check the label to see what materials it will work on, and test it if you can! Some adhesives will dissolve certain materials; others simply won’t stick. Some take days and days to dry completely. There are soooo many kinds of glue available in the craft aisle, so take the time to make sure you’re getting the right one.

And don’t forget glue dots. These are moldable, and are sometimes the only thing that will work.

And sometimes you don’t need glue at all. For Hellboy here (who made his own right hand of doom),

I ended up making small holes in a bald cap and poking spray paint can tops through for the sawed-off horns. The tension held them in place. (I covered the can tops with crinkled duct tape to give them more texture before spray painting them.)

It’s okay if it looks ugly halfway through. I get overly fixated on making things look pretty at every step, but you can always attach things with as much duct tape as you need and then spray paint over the whole thing. Spray paint does not adhere very well to packing tape, though.

MAKEUP:

Keep makeup basic unless you have experience with it. Trying to cover someone’s entire face another color is harder than it sounds, and you often end up with a patchy, diseased effect. Here is a successful attempt at full-face makeup (well, half face) which I’m including just because I’m thrilled without how it turned out. But it took FOREVER. Forever forever forever. So don’t think, “I’ll just smear on some make up right before we go out.”

Instead, pick the main features and just stick with those. Here’s a less-successful attempt at makeup. The child specifically wanted just the lower half of her face to look like a furry cat, and I tried to comply:

She was actually happy with it, which is what matters; but every time I looked at her, I thought, “Burl Ives!”

Beards on babies: I can’t decide if this is brilliant or stupid, but I also used Nutella to make a Paul Bunyan beard for the baby. I didn’t want to put makeup on the baby’s tender skin, but Nutella felt nice and safe. She did eat most of it before anyone saw her, though.

GENERAL INSPIRATION:

If you’re just starting to figure out how to make the costume, Google “character X costume” rather than “character X.” Even better, Google “character X cosplay,” because those will show you homemade costumes, not store-bought. Other people will have solved a lot of problems for you already, and other people will have picked out which features are really necessary to make the costume look right. I tend to get bogged down in details, but you can get lots of details right and still completely miss the overall look you’re going for.

Any time you can persuade a kid to be a person rather than a licensed character, you’re going to get off easy. Here’s a costume my daughter put together in about three minutes:

The only down side is that everyone now knows we’re horrible parents who let our kids watch Die Hard.

You don’t have to be literal. Do mashups of two characters, or make a nod toward the character, rather than tracking down every last detail. A serviceable, if slightly off-fleek Terminator here:

We forgot to spray paint the gun, but the Austrian accent and the attitude put it across.

Other variations: I had my heart set on dressing the baby as Paul Bunyan (above) for some reason, but I couldn’t find a plaid flannel shirt in her size; but I did find a red and black checked poncho, and did not hear any complaints:

The same goes for lots of other costumes: a ballerina pony might be even cuter (and easier!) than a regular pony; and you can make a meticulously accurate costume from the neck up, and then just wear a plain sweatsuit or a dressy suit, and it will still hit home.

Attitude goes a long way to making a costume work. This Raven costume was really just an approximation, but the way my daughter spoke and carried herself was dead on:

THE FINAL WORD ON APPROACHING HOMEMADE COSTUMES:

There are really two major mistakes you can make with costume-making:

One is making a costume that looks great, but the kid can’t move in it. I once made a “rider-riding-a-horse” costume, with false legs and all. It was adorable and amazing, but completely non-functional. Two steps and the kid was in tears. So make sure it’s walkable; make sure the kid can see; make sure it’s an outfit, not a prison!

If the kid is old enough, he can consent to wearing a costume that is extremely uncomfortable. I wish I had a better picture, but we did the old “severed head on a platter on a formally-set table” costume one year

and it was fabulous. Exhausting to drag around and keep stable, but fabulous. He went around saying “Alms for the bodiless?” instead of “trick or treat” and he got a lot of candy. (Oh, look! Behind him, there’s Ash with his milk jug chain saw hand.)

The other terrible mistake you can make is trying to make the costume look the way you want it, rather than how the kid wants it. Do it their way, whenever possible.

I had wonderful plans for Nightmare Moon. The four-year-old, however, had plans which were wonderful to her, including make up design. So those were the ones we went with. She got lots of candy, too.

Same with Rey, here. I had some wonderful ideas for how to make it look more authentic, but she had her ideas, and it was her costume. She was a very happy girl.

And then sometimes the kid says she wants to be a Pink Mummy Ghost. What is this? We don’t know. We only hope that, by some miracle, the thing we come up with is the same as whatever it is that’s in her crazy head.

And my final bit of advice? Don’t feel like your honor as a DIYer is on the line. If there’s a shortcut to be had and you can spend the money, go ahead and spend the money. I realized that I could buy furry fabric and sew squirrel girl, above, a wonderful tail, or I could buy some readymade furry leg warmers (intended for what costume, I do not know), attach them together with safety pins, stuff them, and it was, what do you know, a wonderful tail.

And guess what? Here is a “Vampire Queen.” How much of this costume did I make by hand? NONE. A little face paint. She was delighted.

So if you need permission to give yourself a break, I hereby grant you permission.

Especially if you are making a costume for a toddler. The more time and effort you put into making a costume for a toddler, the less likely it is the little crumb will wear it. Here is a child who said repeatedly all through October that she wanted to be Wonder Woman, or possibly Dashi:

And that’s how that goes. Happy costuming! Please share your tips and hacks in the comments. And seriously, if you’ve ever come up with a good way of making a cat tail that curls up but doesn’t make people feel uncomfortable when they wear it or see it, let me know asap.

What fresh hell is this? It’s Pinterest Christmas 2016!

Feeling a dearth of burlap, foxes, chevrons, fairy lights, and mason jar lids in my life, I went on Pinterest to see what was happenin’.

I always start out with wholesome intentions, sincerely searching for neat DIY ideas. I even bought a set of plain glass balls, and I intend to spray paint them, using tiny paper snowflakes as stencils. As stencils! It is going to be pretty. Tell me it’s going to be pretty!

I start out, I say, with good intentions, looking for ideas that we will enjoy trying out; but I always end up calling my husband over for backup to help me mock stuff more thoroughly.

Because son, there is some stupid shit out there.

For your convenience, I’ve organized my thoughts into some basic rules to help you identify when you’ve slipped past DIY and landed smack in the middle of WTF, by which I obviously mean Where’s the Fphrenologist to feel your lumpy head and figure out what would impel you to follow through with some of these hideously inexcusable projects?

Things that would bring shame to hobos. Okay, so we all have failed crafts and stupid crafts and crafts that don’t turn out so great. That is fine. I have a number of them displayed around my house, because I have low standards.

But when I do come up with something lousy, I do not then use an expensive camera to take luxe photos of it and offer tutorials for how to recreate it in your own home. And not only because it didn’t occur to me! It’s because when you take a sweater and cut it up into heart shapes and then stick a paper clip through it, that’s not a cozy winter ornament. That’s garbage.

When kids make things that turn out a little rough and wobbly, that’s cute. When disabled people make things that are kind of naive and clunky, your heart is allowed to melt. But functioning adults are not allowed to just churn out crap and call it “adorable” just because it looks bad! Bad is bad! It’s not twee or offbeat or funky! It’s just bad! Bad bad bad!

(If you want to live a little, browse around in this chick’s site. Do not miss the confetti updo, which, the tutorial will instruct you, can be achieved by braiding your hair and then using your head to clean under the couch. In another spot, she instructs you to roast a turkey, cram some pom poms up its ass, and call it “festive feast.” I BET IT IS.)

Craft projects that require you spend $18 on a hobby store fake version of something people used to throw out back once the hogs were done with them. You know it must be within ten days of a major American holiday when local message boards are full of frantic pleas: Does anyone know where I can find wooden pallets? No, honey, nobody knows, because they have all been painted like terrible flags for the fourth of July, hung on the walls of pretentious condos for terrible wine racks, transformed into terrible herb planters in the front yards of people who wouldn’t know what to do with basil if grew with instructions right on the leaves, or tacked together by someone’s gloomy husband who would be perfectly willing to shell out cash for an actual, real, non-wobbly coffee table that doesn’t give you splinters, but now we have to spend all Thursday night sanding, and the Raiders are playing, too.

Leave pallets alone. Also milk bottles, mason jars, pre-weathered planks, and fruit crates. Gosh.

When you have a display, rather than decorations. Stores put up holiday displays. Businesses put up holiday displays. School children get together and work on a nice display together. But why are we doing this as individuals living in our homes? Why do we buy three shrink-wrapped bales of disinfected hay upon which to prop up some easily-identifiable symbols of the current holiday season in a studiously asymmetrical fashion, and set it up just to the left of the entrance to your home, and then forbid the children to play in the front yard because you’re trying to make it look homey with all those corn stalks you bought for eleven bucks a bunch? It’s your house, and you’re supposed to be living in it, not marketing it.

A small-scale rendition of this trend is when you take perfectly good stand-alone ornaments and tag them with keywords designed to snag maximum pageviews. You know what I mean: You have five glass balls in tasteful blue and silver, and that’s fine, but then you have to buy a special glass-writing marker and label each one with a Certified Holiday Word (without upper case letters or punctuation, of course, because we are having fun!). “Jingle” says one. “Merry,” explains another. “Star,” posits a third.

What? What? What is this for? This is stupid.  If you like jingling so much, maybe use a bell, eh, smartacus? This is one of those things that people only do because other people are doing it, so it seems normal and cute and pretty, but it’s not. It’s stupid and it’s making the word stupider.

Subset: those astronomically smug, oversized wall decals that literally spell out exactly what kind of family you are. “WE DO LOVE! WE DO MESSY! WE DO OOPSIE WOOPSIE DOO ON THE REGULAR! WE SHINE FULL TIME! LOOK AT MY WHITE TEETH! I DEMAND A GOLD MEDAL FOR NOT FLIPPING OUT WHEN CARTER DROPS A CRACKER ON THE CARPET! CAN YOU EVEN BELIEVE YOU GET TO BE FRIENDS WITH US!” No, I can’t. Please give me my coat back; I really must be going. I think I left my humidifier running, and the cats are going to get all waterlogged.

Yeah, yeah, I know, they’re not there for guests. They’re there for the actual family, to remind them of their own ideals. Except they’re not. They’re totally there to impress people, along the lines of those “Another family for peace” bumper stickers. I’m going to start my own auto insurance company just to design a rider specifically to cover people who deliberately rear-end another family for peace.


Inedible food ornaments. This may just be a hangover from some stinging childhood disappointment, but I feel like it’s bad form to fill the house with marvellous scents and then not get to chew on anything. Gingerbread cookies? Those are for eating. Applesauce is also for eating, and not for compressing into little weird brick stars and hearts that only look like non-poop if you tell people, “Those are made of applesauce, you know!” I’ll make an exception for clove oranges, because they really are pretty, and they have a venerable past. But no more dried applesauce poop. It doesn’t make me mad, it just makes me sad. I like applesauce.

Complete non-ornaments that just stare baldly at you, daring you to wonder if this is, like, the lost and found shelf, or what. Skis, ice skates, sleds, bicycles, wagons, whatever. You are not TGIFridays, nor were meant to be. Just because you manage to hang it on your wall, that doesn’t magically transform them into decor. This offends my thrifty heart, and it also violates the whole “decoration vs. display” rule.

Now, if you’re trying to sell me on the idea that industrial design can be beautiful, that is one thing. I will actually go to a museum and look carefully at a very good toilet or a telephone or a circuit board, because I like design. But that is not what is going on here. What is going on here is that some deranged housewife gets it into her head that anything that is no longer for sale at full price at Bed, Bath and So Forth must be automatically nostalgic, and therefore decorative. My only comfort is that deranged people are bad at hanging stuff, so it will probably fall down at some point and hit somebody. Kapow! Where’s your nostalgia now?


Things made out of books.  Okay, so if the book was going to be destroyed anyway, that’s fine. But the thing that gets me is “She loves books so much, she made a whole chair out of them!” Hey, that’s great. I’m entirely blown away with your thorough grasp of the purpose of the written word! Or maybe you love books so much that you cut them up into bits and torture them into a gluey diorama depicting a scene from that book, that’s how much you love books!

Super duper. Remind me not to let you babysit my kids. Yes, I know you said you love kids. I heard you.

***

In closing:  Yes, I write things like this because I am a bitter, unhappy person who finds fulfillment in criticizing others, even though their behavior in no way impacts my life. Please pray for me.

Yes, mason jars are still a thing, still. I checked.