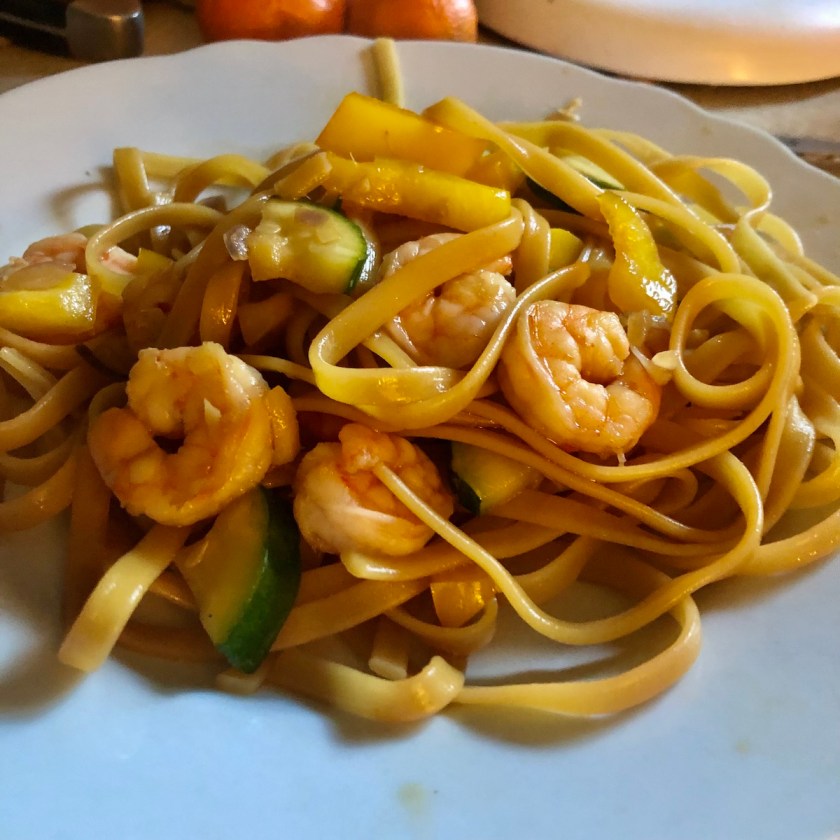
Happy Friday! Boska!
SATURDAY
Leftovers and Aldi pizza
Just a regular Saturday, as far as I can recall. The shopping turn kid is a thrift store fanatic like me, so we ended up adding three stops to the normal run. I got this cake platter which I’m not 100% sure is a cake platter, but it was in the kitchen section.

I figured if it was actually a plaque and toxic or something, I could just put a piece of parchment paper on it before serving food. You can see it has these invaluable holes for trapping meringue and caramel, which will be important later.
I also bought a wig (new in package! I like excitement, but not lice excitement) that may or may not come in handy for the Halloween costume I may or may not wear.
On Saturday, I started making ice cream for a baked Alaska for Clara’s birthday! Actually, I think I started on Friday. Actually, I started last week, because I was confused about what the date was. Long story short, I ended up making ice cream something like seven times before I figured out that someone had set the freezer at the lowest setting and that’s why my ice cream kept going wrong. THAT’S WHY.
SUNDAY
Grilled ham and cheese, chips, tomato soup
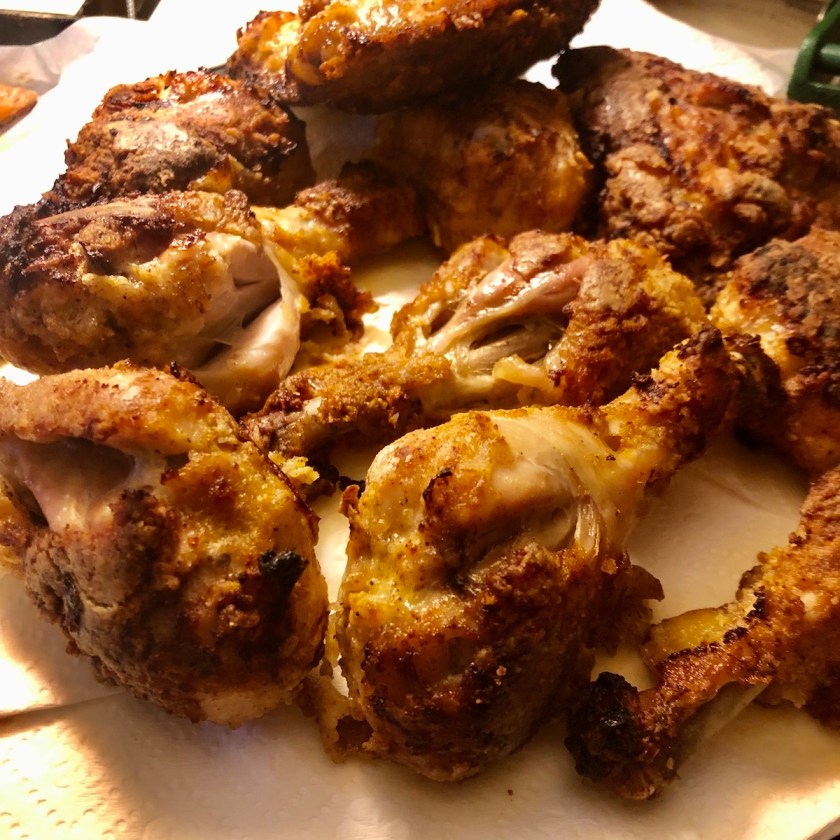
Damien was planning to start Monday’s birthday meal, but he was feeling terrible, so I took over. It was the Deadspin chicken cutlets, which are so delicious, we always make three times as much as we need, so we can just keeping eating them all week.
I think I had about nine big fat chicken breasts, and I sliced each one into four thin cutlets, and then I pounded them flat. Wrapped those up and put them in the fridge, and made the sauce, which is olive oil and red pepper flakes, onions, garlic, canned tomatoes and their juice, tomato paste, and a ton of red wine.
Then I made an orange pound cake (I used a Krusteaz mix and added orange juice and zest), and got back to making ice cream, which I had to interrupt the other day because oops, no corn syrup in the house.
Nice easy supper, grilled ham and cheese and tomato soup.

Truly an unbeatable weekend meal.
So when I asked Clara what she wanted for her birthday, she said “the fanciest ice cream known to mankind,” and it was my idea to make a baked Alaska. The plan I eventually came up with was this:

So all the elements were:
-Orange pound cake with orange glaze (Krusteaz mix)
–Olive oil saffron ice cream with burnt orange ripple
–Triple chocolate ice cream with hazelnuts
-Fresh strawberry jam (2 lbs strawberries pureed, juice of half a lemon, maybe 3/4 cup sugar)
-Blackberry ice cream
I can’t seem to find the recipe for the blackberry ice cream, but I wasn’t crazy about it anyway. It left kind of a film on my teeth, and it didn’t get you to sieve out the seeds, so it was seedy. Probably could have anticipated that, but I did not.
I ended up churning the saffron olive oil ice cream twice (freezing the bowls in between, so this was over the course of several days), and the damn stuff still would not freeze. So I ended up rescuing it this way, thanks to a suggestion on Reddit: I put it in the freezer in the mixing bowl for 25 minutes, and also froze the whisk attachment, and then scraped the sides and whisked it for a few minutes to combine it, then put it back in the freezer for 25 minutes, then took it out and mixed it, etc. I did this about six times, and eventually it turned into actual (if soft) ice cream, WHEW. So that’s good to know! Sometimes ice cream just will not freeze, but it can be saved!
Anyway, here is a picture of the orange caramel:

It didn’t come out as dark as in the recipe, but hooooo boy. Was this ever up my alley.
I will tell you now that the saffron olive oil ice cream was good, not incredible. It did taste like olive oil and saffron, and it went really well with the orange caramel, and it was incredibly rich and creamy, and turned out a gorgeous intense yellow. Just not something I’m going to rush out and make again. (You should know the recipe is written in a slightly nutty way. For instance, these are the first three ingredients:

So you’re thinking, “ah, she will have you add cornstarch at two different times.” Nope! Just four teaspoons of cornstarch, but confusing. Oh well.
MONDAY
Chicken cutlets, baked Alaska
Monday I made the strawberry jam, which is always a lovely way to spend half an hour:

I got all the elements assembled and into the bowl around 2:00, which. . . should have been soon enough.
For a more detailed guide on how to assemble a Baked Alaska, I wrote it all out in this post, when I made one for our 25th anniversary.
Then I put the tomato sauce for the chicken in the slow cooker to stay warm, and got hopping on the chicken! You coat each piece in salted, peppered flour, then in beaten eggs, and then in a mix of half breadcrumbs, half grated parmesan cheese. Then you fry those suckers in olive oil.
When they are browned on both sides, you lay a basil leaf on each one, top it with a slice of provolone, and lay a scoop of hot sauce over the top.

Beautiful. Magnificent. We generally only have this meal on special occasions, because it’s labor intensive and expensive, buy wow is it good. I was happy Damien was able to enjoy eating it without having labored over it all day, for once!
After we recovered from feasting for a bit, I made a meringue. Last time I made a meringue, the sugar was a little gritty, so I tried a technique from King Arthur Flour where you combine the egg whites and sugar (I actually hedged my bets and used superfine sugar, which is sugar whirred up in the food processor) with cream of tartar and salt and whisk it over a pot of simmering water until the sugar dissolves.

and then you beat it in the standing mixer as usual until it’s stiff. Worked great! No gritty sugar.
Then you pull the baked Alaska out of the freezer, flip it and ease it out of the bowl, slap meringue all over it, and either bake or torch it.
This baked alaska was, like so many of us, beautiful but unstable. Some of the ice cream was softer than I wanted, and the caramel was pretty oozy. So I handed Clara the torch and she did the honors.
You can see it sliding! Exciting!

Then I slopped a little bit spiced rum on it, and we lit that on fire, too. It never stays lit as long as I expect it to, but it’s pretty.

When I sliced it, you could see that I . . . well, remember when I was making the brick patio and I really tried to get the layers level, and I really did what I could, but at a certain point I just embraced the wobble? That is basically what happened here, except this time I didn’t hit myself in the face with a shovel.

Sort of a Jabba the Baked Alaska situation.

Jabba wah ning chee kosthpa murishani tytung ye wanya yoskah. Hoh hoh hoh hohhhh, and haaaapy birthday.
Anyway, it was delicious. Will absolutely be making the chocolate hazelnut recipe again (it’s made with dark chocolate, cocoa, and Nutella, plus toasted hazelnuts), and the orange caramel part, if not the olive oil saffron ice cream, and will use that meringue technique going forward, too. Everyone was stuffed with food, and sat around and yakked and laughed, and she liked her presents, and we had a nice time. Yay!
TUESDAY
Leftover chicken cutlets
Tuesday, as planned, we had leftover chicken. I had been planning spaghetti with sauce and cut up chicken, but I was so exhausted by evening, I told everyone to just do whatever they wanted. I myself toasted some bread and made a little sandwich.

Actually quite a big sandwich! Yummy.
Then one kid started to flip out at another kid, and I asked kid 2 if she wanted me to intervene, and she said, “Can you do it without escalating the situation?” and I thought about it, and said, “No.” Then I fixed myself a bowl of saffron olive oil ice cream with burnt orange caramel swirl, sat on the couch, wrapped myself in a blanket, and pretended I was alone.

Alone with my ice cream.
If you are wondering how my weight loss journey is going, it’s going great. I find that if you fry My Fitness App in olive oil, it comes out a really nice toasty brown.
WEDNESDAY
Chicken burrito bowl
Wednesday I didn’t super duper have a plan, but I had a bunch of chicken legs that were on sale, so I put them in the pressure cooker with some salsa and some water and pressed the “poultry” button.
When they were done, I pulled the meat off the bone and put it in the slow cooker with the rest of the jar of salsa, and used the pressure cooker again to make a big pot of plain rice. I served the chicken and rice with corn, cilantro, sour cream, shredded pepper jack cheese, lime wedges, and a sophisticated garnish of flaming red Takis.

And a little hot sauce on top. And it was very good!
THURSDAY
Kielbasa, brussels sprouts, red potatoes
Thursday I suddenly remembered I promised I would take Corrie to some kind of turtle presentation at the library. So I zipped around prepping supper, and left it on the stove with a note on when and how to cook it, but then I forgot to tell anyone to do it, and they texted me, but I guess I had my ringer off? Sorry, busy admiring turtles.

Look at those pulkies!
The kids smartly figured out to put the food in the oven, and I came home in time to finish cooking it.
Here’s the recipe:
Jump to RecipeSo it cooked halfway, and then I stirred it up and poured the sauce over it and finished it cooking, and then finished it under the broiler to crisp up the brussels sprouts. Oh do I love some crisped-up brussels sprouts.

I actually didn’t have any honey, so I used brown sugar. I ended up needing a lot more than I expected to make it as sweet as honey, and then I ended up using more brown sugar than I meant to, so it turned out quite sweet. Nobody complained, though! This is such a great fall meal. It would have been really good with some beer bread or biscuits, but this was not the day for that.
Here’s the beer bread recipe anyway.
Jump to Recipeand here’s what it looks like.

I don’t really miss drinking at all, at this point. It’s been over two years! I do miss having beer and wine in the house to cook and bake with, though. (Obviously I go out an buy it if I need it, but it’s a hassle.) Anyway, mmmmm, beer bread.
FRIDAY
French toast casserole, hash browns
Still trying to figure out how much bread to buy now that the chief sandwichman of the house has moved out, and we have a ton of bread hanging around, so french toast casserole it is.
(For this, you just tear up bread, mix it with milk and egg batter with maybe some vanilla and a little salt, pour it into a buttered casserole dish, dot it with butter, and sprinkle cinnamon and sugar on top; then bake until the egg is firm.)

Perhaps I will give the children a thrill and put chocolate chips in it. Not that they deserve it, but who among us.

One-pan kielbasa, cabbage, and red potato dinner with mustard sauce
This meal has all the fun and salt of a wiener cookout, but it's a tiny bit fancier, and you can legit eat it in the winter.
Ingredients
- 3-4 lbs kielbasa
- 3-4 lbs red potatoes
- 1-2 medium cabbages
- (optional) parsley for garnish
- salt and pepper and olive oil
mustard sauce (sorry, I make this different each time):
- mustard
- red wine if you like
- honey
- a little olive oil
- salt and pepper
- fresh garlic, crushed
Instructions
-
Preheat the oven to 400.
Whisk together the mustard dressing ingredients and set aside. Chop parsley (optional).
Cut the kielbasa into thick coins and the potatoes into thick coins or small wedges. Mix them up with olive oil, salt, and pepper and spread them in a shallow pan.
Cut the cabbage into "steaks." Push the kielbasa and potatoes aside to make room to lay the cabbage down. Brush the cabbage with more olive oil and sprinkle with more salt and pepper. It should be a single layer of food, and not too crowded, so it will brown well.
Roast for 20 minutes, then turn the food as well as you can and roast for another 15 minutes.
Serve hot with dressing and parsley for a garnish.

Beer bread
A rich, buttery quick bread that tastes more bready and less cake-y than many quick breads. It's so easy (just one bowl!) but you really do want to sift the flour.
This recipe makes two large loaf pan loaves.
Ingredients
- 6 cups flour, sifted
- 2 Tbsp baking powder
- 2 tsp salt
- 1/2 cup sugar
- 2 12-oz cans beer, preferably something dark
- 1 stick butter
Instructions
-
Preheat oven to 375
-
Butter two large loaf pans. Melt the stick of butter.
-
I'm sorry, but you really do want to sift the flour.
-
In a large bowl, mix together dry ingredients, and stir in beer until it's all combined and nice and thick.
-
Pour the batter into the loaf pans and pour the melted butter over the top.
-
Bake for about 50 minutes until it's crusty and knobbly on top.